 This tutorial shows you how to deploy a Rails app on AWS Elastic Beanstalk. This is part of a series on Running Rails in AWS.
You can use Elastic Beanstalk through the AWS Console or through the CLI. Here we’ll use the Elastic Beanstalk CLI.
Install the EB CLI
On Mac, install aws-elasticbeanstalk using HomeBrew.
brew install aws-elasticbeanstalk
If you’re not using HomeBrew or if you’re on Linux, you can install it using pip.
sudo pip install awsebcli
On Windows, run
pip install awsebcli
Clone the Rails app
We’ll use Git to clone the sample app from Engine Yard. If you want to use your own Rails application, the EB CLI requires that you put the app in a Git repository.
git clone https://github.com/engineyard/todo.git
Create IAM Roles
We need to create 2 IAM roles, aws-elasticbeanstalk-ec2-role and aws-elasticbeanstalk-service-role. These can be created using the Elastic Beanstalk console.
So while we are using the EB CLI to create the application and environment, we’ll click Create New Application on the Elastic Beanstalk console for the sole purpose of creating these IAM roles. You only need to do this once.
- Open the Elastic Beanstalk console.
- Choose Create New Application.
- Proceed through the wizard until you reach the Permissions page.
- Choose Next to open the IAM console.
- Choose Allow to create the roles.
These instructions were taken from the AWS website.
Set up EB CLI
cd todo
eb init
You need an AWS Access Key and an AWS Secret Access Key. If you don’t have these, go to the IAM console to create a user and download the credentials.
You can select the defaults for the region, application to use (Create new Application), and the platform version (Ruby 2.3 Puma).
The Engine Yard todo app already includes puma on the Gemfile. If you’re using your own Rails app, make sure you add puma.
Create the Environment
eb create todo_production
Elastic Beanstalk will create a Security Group, ELB, and Auto Scaling group for you. After about 3 minutes, your environment is ready. Check the app with
eb open
The Engine Yard todo app has an Environment Info page. Click the link at the top and it will show you something like this
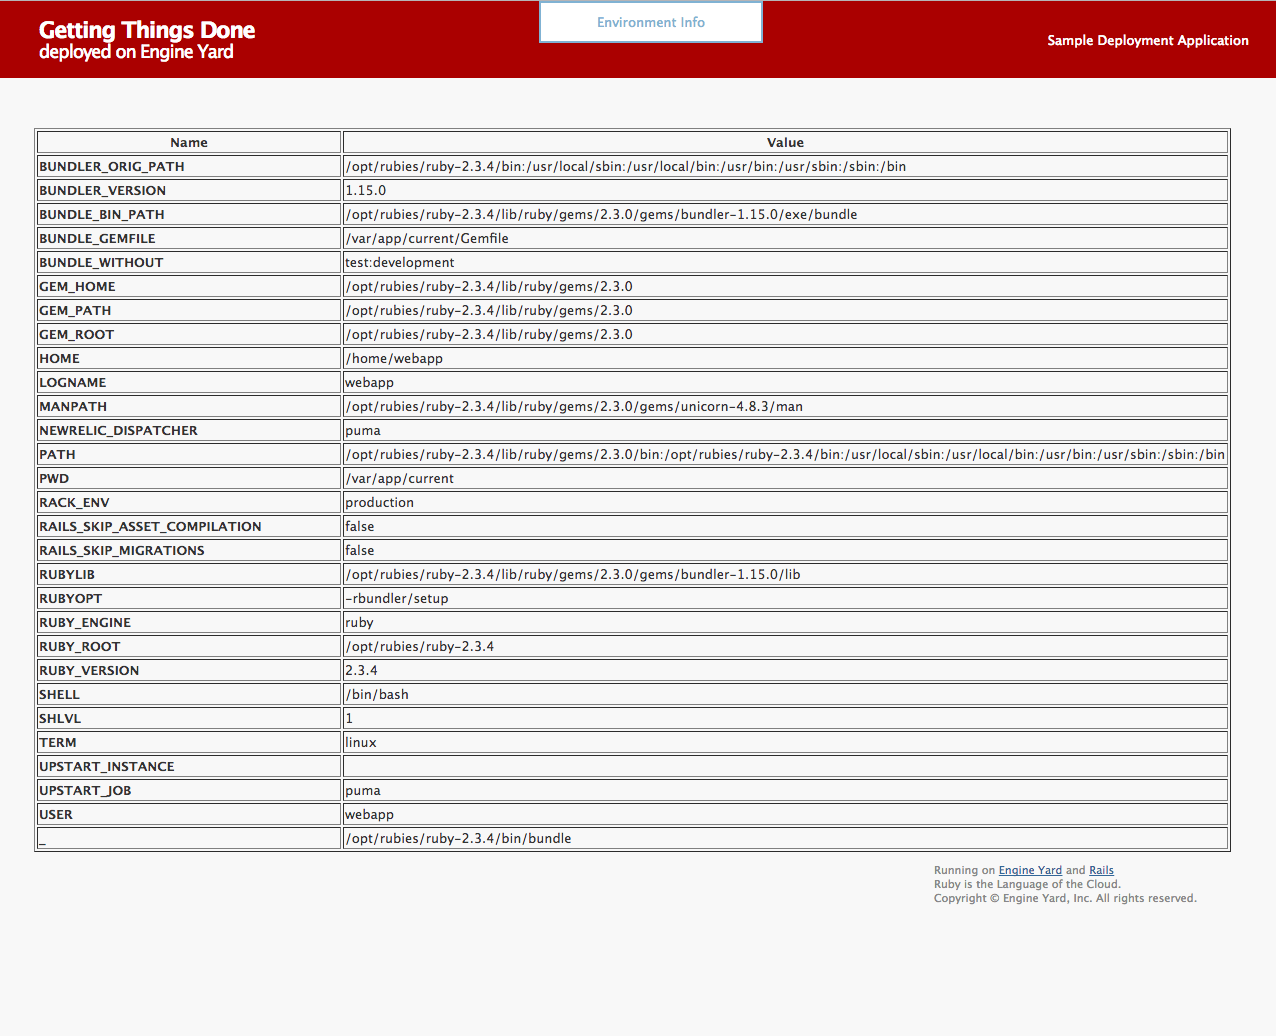
Some interesting things to note are:
- Ruby is in /opt/rubies/ruby-2.3.4
- The Rails app is in /var/app/current
- The user is named webapp
You don’t need to know any of these as Elastic Beanstalk manages the EC2 instances for you. But you also have SSH access so if you want to look around the EC2 instance, these are some information that can help.
Create a Database
The todo application works even if we didn’t set up a database because config/database.yml uses a sqlite3 DB. However, this is the wrong setup for real applications. The todo_production environment only has one EC2 instance so it’s fine for now. But if the Auto Scaling group creates a second EC2 instance, this new instance will have its own sqlite3 DB which is not what you want.
To use a central database, delete config/database.yml. We don’t need this file as we’ll be using DATABASE_URL.
git rm config/database.yml
git commit -m 'Remove database.yml'
Create an RDS instance using the RDS console. You can use either MySQL or PostgreSQL. Both are supported by the todo application as the mysql2 and pg gems are already part of the Gemfile.
Enter ‘todo’ on the optional field Database name. The logical database will be created after the RDS instance is created.
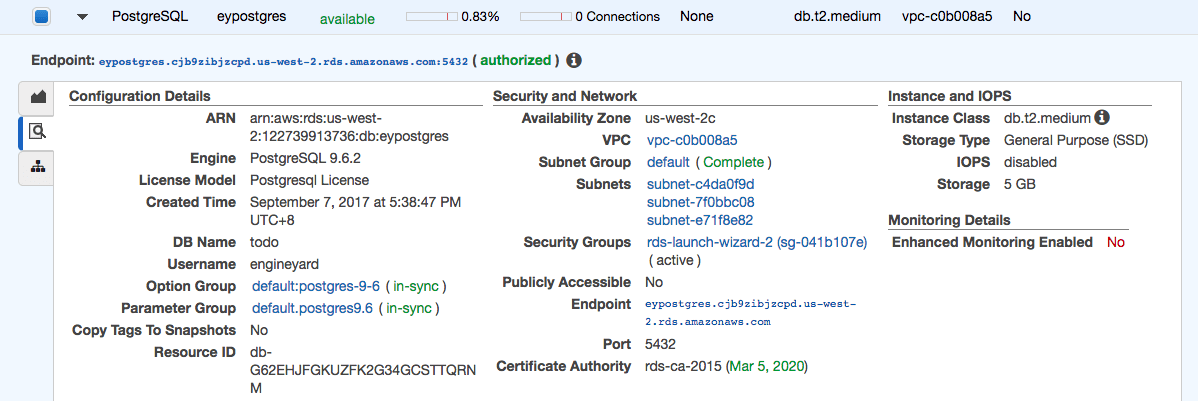
Set Publicly Accessible to No for security purposes. Once the RDS instance is ready, click the Details icon and click the Security Group. You’ll see something like rds-launch-wizard-2 (sg-041b107e).
On the Security Group page, click Inbound then Edit. Add a rule for PostgreSQL. Select Custom as the source and enter the Security Group of the Elastic Beanstalk environment. Type sg to bring up the list of Security Groups.
If you can’t find the correct Security Group, it has the Elastic Beanstalk environment id on the group name. To get your environment id, type eb status. For example, my environment id is e-kq7hjkf7dt and my Security Group name is awseb-e-kq7hjkf7dt-stack-AWSEBSecurityGroup-44MI138FQVG. Do not select the one with AWSEBLoadBalancerSecurityGroup on the name.

The EC2 instances created by Elastic Beanstalk should now have access to the RDS instance.
You can also create an RDS instance tied up to the Elastic Beanstalk environment. However, this is not recommended because when you terminate the environment, the RDS instance will be terminated too.
Set DATABASE_URL
Set the DATABASE_URL environment variable using the RDS credentials. The format is db_type://username:password@hostname:port/db_name.
For example, if we created a PostgreSQL instance, with the following credentials
user: engineyard
password: mysecretpassword
hostname: eypostgres.cjb9zibjzcpd.us-west-2.rds.amazonaws.com
port: 5432
db name: todo
then we should run
eb setenv DATABASE_URL=postgres://engineyard:mysecretpassword@eypostgres.cjb9zibjzcpd.us-west-2.rds.amazonaws.com:5432/todo
Next, deploy the app without database.yml and open the page.
eb deploy
eb open
You now have a Rails app running on Elastic Beanstalk that uses a standalone RDS instance.
Secret Key Base
Set SECRET_KEY_BASE if you’re using this environment variable. Or if you’re using encrypted Rails secrets, set RAILS_MASTER_KEY.
Generate a new secret key base with bundle exec rake secret.
eb setenv SECRET_KEY_BASE=cccae61c0c117c787745b596655caa50062dc3fc739505df02e209d9e737a2f39ab484d20e63d5937e1c58901e81109523807f66be421728851fecc2262ed5a8
SSH
When you run eb init, you can tell it to add your public key. It can also create a new keypair. If you have already run eb init, you can run it again with the --interactive option.
Run eb ssh to connect to an EC2 instance in your environment.
Running Rails in AWS Elastic Beanstalk: Summary
Elastic Beanstalk provides an easy way to deploy Rails applications on AWS. You give up some control as the supported Ruby versions and App servers are limited.
Support for background workers like Sidekiq needs improvement. Currently, you have to create a file on .ebextensions and the Sidekiq workers run on the same instance as the Rails application. On a medium-sized application, you should have a dedicated instance for Sidekiq.
This blog post is part of a series. Other options for running Rails in AWS is by using EC2, ELB, and RDS directly, EC2 Container Service, and Engine Yard. Check out the overview here.