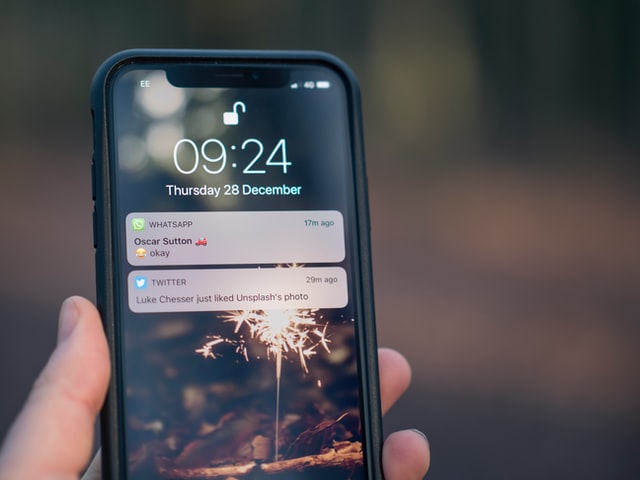
User engagement is of the highest importance in today’s world, no matter what you sell or offer to your clients. And mobile phone notifications play the masterstroke in this aspect. By regular interactions with your clients through push notifications, it is possible to release timely updates and stay connected with them. So, let us discuss setting up an Apple push notification service (APN) with a Node.js application today.
In this blog, we will discuss in detail the APN services, enable and register for remote notifications, device token ids, and APN node package with the help of a sample iOS. Make sure to have a physical iOS device, as push notifications won’t work with the simulator. Also, an Apple Developer Program Membership account is a must for creating a Push Notifications Certificate.
Getting to know about the Remote Notification Service
Apple devices use a remote notification service to send and receive notifications in any of the iOS, tvOS, or macOS. The remote notification setup is to be configured in your Apple device with proper device tokens and certificates. Otherwise, there are possibilities that the notification services don’t work as expected.
The main component of this remote notification setup is the Apple Push Notification service, also known as APNs. APN in actuality is a collection of services that allows the developer to send the notifications from their server to the targeted iOS devices. The APNs are robust and secure methods to establish a connection between the provider server and individual Apple devices.
APN contains two components, the Gateway component, and the Feedback component, both of which are must-haves.
Gateway component establishes the TLS connection from a provider side which enables the provider server to send messages to the Apple, which will be processed by Apple and then forwarded to the respective device. It is recommended to keep the connection in an ‘always-on’ mode. The Feedback Component is established only occasionally to identify and remove the devices which no longer receive notifications for specific applications. This is a mandatory component in any Apple device.
To receive and handle the remote notifications, the app you provide must have four components as basics. They are:
- Remote connection enabled
- A registered Apple Push Notification Service (APN) and device token
- Sending device token to the notification provider
- Establish support to handle incoming notifications in the device
Once the push notification setup is complete in your apps and the provider server-side, the providers can send notification requests to APNs. they convey the notification payloads to each targeted device. As the notification is received, the payload is delivered to the respective app and user communications are managed. It is great to note that the APNs hold the notifications if the device is powered off and waits till the device turns power on while trying multiple times to deliver the message to the appropriate app in the device. This makes it perfect for the user and the provider not to miss any important communication.
It is good to have a clear and strong understanding of the APNs, direct from Apple’s guides.
The provider is entitled to many responsibilities. Some of the major ones are below:
- Receive globally unique, app-specific device tokens and all relevant data pertaining to your app on user’s devices.
- Determine when the remote notifications are to be sent to each device.
- Building and sending notification requests to APNs.
Only with proper entitlements to talk to APNs, can the app handle the remote notifications. Without these entitlements, the apps are rejected by the App Store. Know the details of entitlements required for your app in the ‘Enable push notification’section of the Xcode Help page on Apple’s website. Once notification pushes are enabled, app registration is a must every time the app is launched. The process of app registering includes the below steps, for all Apple devices.
- Your app asks to be registered with APNs
- APNs sends app-specific device tokens
- The system delivers the device to your app by calling a method in your app delegate
- The device token is shared with the app’s associated provider
A method registerForRemoteNotificationsis called at the launch time by your app. This initiates the app object to contact APN for app-specific device tokens. Below code shows how to fetch your device token:

Swift:

Know more about the Remote and Local notificationson Apple’s page.
Thus, the system establishes an encrypted and persistent IP connection between the app and APNS, whenever the app starts on a device. This connection setups and enables the device to receive notifications, thus requires configuration on the Apple development account and necessary certificate creation.
For our servers to communicate with the APNs, a lot of connections and configurations are to be done in Node.js. It is easier to opt for the apn packages with preset code to establish error-free connections. This ready-to-use package is one good choice for the production environment. The package is based on HTTP/2 API and is capable of maximizing the processing and notification delivery. It also collects the not-sent notifications when an error has occurred. The official repository of the apn packagewill gives a better understanding of this topic.
Creating Certificates
One main step in setting up the notification services is the certificate creation, specific to your app and device. This certificate tells the APN that our server has legal permissions to send and receive notifications of our app. That means the SSL certificate establishes a secure connection with the APNs. The certificate for our is created by us and is specific to our app alone.
Proceed with the below steps to create a certificate:
- Open the project from Xcode, and select the Capabilities tab from Target.
- Enable Push Notification switch and wait for automatic configuration to be completed.
- In the developer center, search for our app in our developer account. Tap Edit.
- Open the Push Notification section on this screen.
- Open ‘Create Certificate’ in the Development SSL Certificate tab
- Follow the procedure in the upcoming steps on the screen to create a certificate. The certificate will be ready for download once created successfully.
- Download the certificate aps_development.cer.
- Select the certificate and private key from the list and export a p12 file. Type in the password and note to remember the newly created password as it will be needed by Apple to send push notifications.
Obtaining device token
In the above section, we saw the general code to fetch device tokens. Let us consider a scenario-specific code that we can further use for Node.js script creation.
Our sample app is titled SimplRTApp. We need to identify the device tokens to push notifications from the sample app. So, to get the device token, add the following methods on our AppDelegate.swift.


View the raw code for the below snippets in the github library.
Also, check the final app code for SimpleRTAppfor further details.
The Node.js Script Creation
We now have a p12 file to establish a secure connection with the APNs and a device token to send push notifications to this device from our SimpleRTApp. All we need now is to create our program on Node.js and test the push notifications.
To create the Node.js script:
- Open the terminal app.
- Need to install the module that handles APN connections. For that, type npm install apn.
- Copy or save the p12 file to the folder same as that of our Node.js script.
- Create the below script(available from Github).

In the script, the <device-token> and <p12-password> are replaced by the values specific to our app. The above script does the following to set up a real-time push notification when triggered.
- Establish the connection
- Instate the provider object
- Create Notification and send with the send() method
- Finish execution when there is a response for either success or error scenario
With the above script, the push notification setup is complete. Now is the time to test the script. For testing, type node send_push.js in the terminal and wait for the notification to arrive in the mentioned Apple device.
Complete script for the push notification service in check in the GitHub and is available for your reference.
It is a good practice to include a custom action with the notifications. It allows the user to communicate quickly with a proper preset response. Examples for custom actions include the ‘Reply’ or ‘Mark as read’ button in a message notification, ‘Install’ or ‘Snooze’ options in an OS update notification, etc. in our case, one easy and simple custom action would be ‘Retweet’.
Simple edits on the Node.js code shared above will enable these custom actions. Let’s see how to proceed.
While setting the notification object, include below:

Also, to let the iOS app know it is an allowed action with the below code:

Thus, for our AppDelegate.swift, the script would be as follows:


Conclusion
As we come to the end of this blog, we have discussed all the below points in detail
- The remote notifications
- APNs
- Certificate creation
- Fetching Device tokens
- Node.js code for delivering push notification